How To Connect & Register A Wallet
If you have an existing blockchain wallet, you can register the wallet to receive messages sent to that address. Visit connecting and registering wallets to learn more about connecting wallets.
This guide goes through the steps of connecting and registering an Ethereum (or EVM) wallet address with Mailchain. The process is broadly similar for most wallets and protocols.
Guides for all supported protocols, web domain name services and identities can be found under Registering Wallets & Identities.
Register an existing blockchain wallet address
Step 1: Connect your wallet
- Metamask
- WalletConnect
- Coinbase Wallet
Follow these steps to connect and register an existing blockchain wallet address:
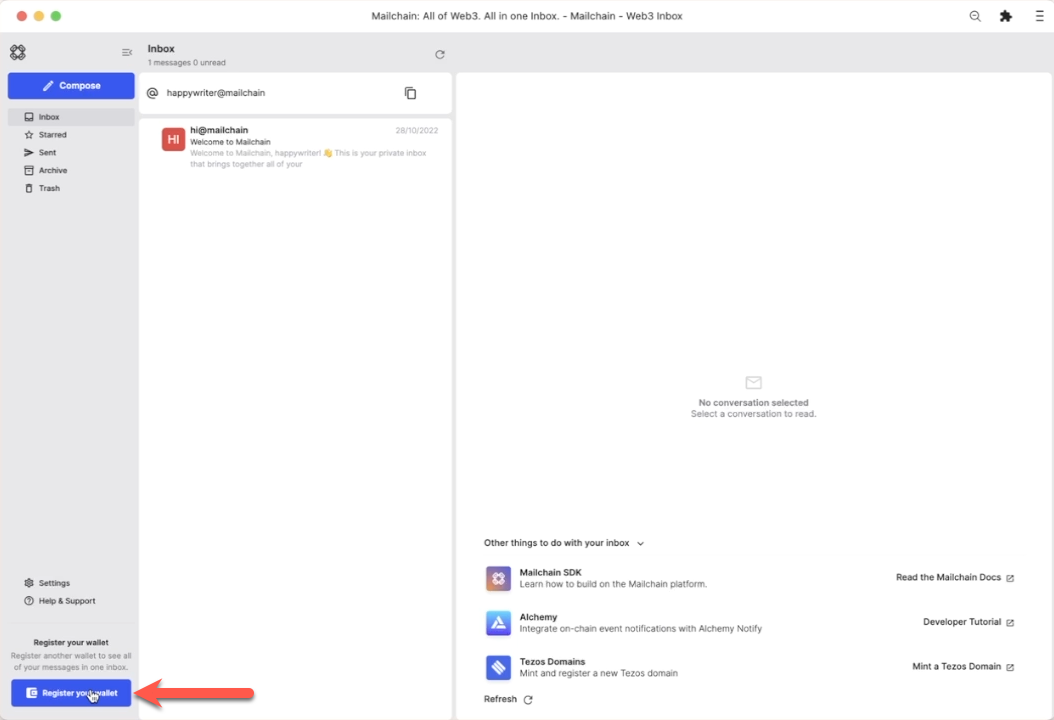
Once you have signed into Mailchain, head to your Inbox (https://app.mailchain.com/inbox)
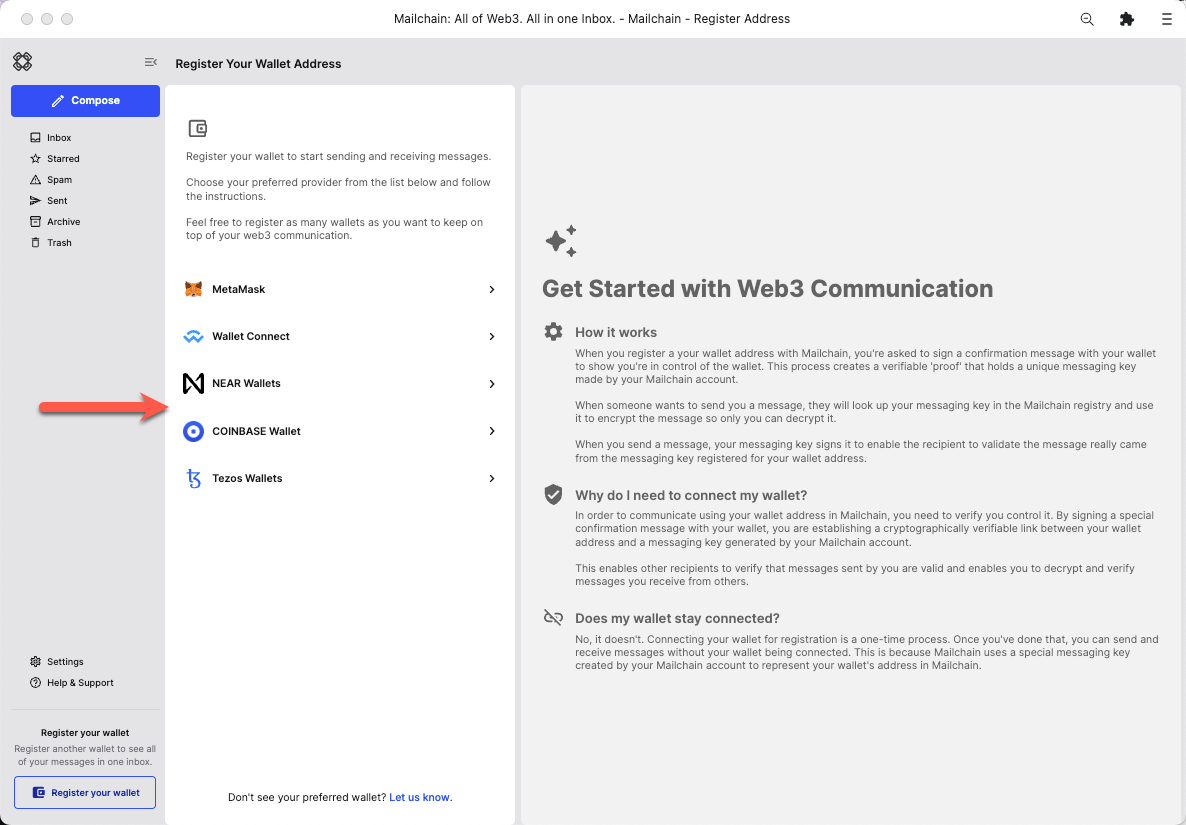
Click 'Register your wallet'
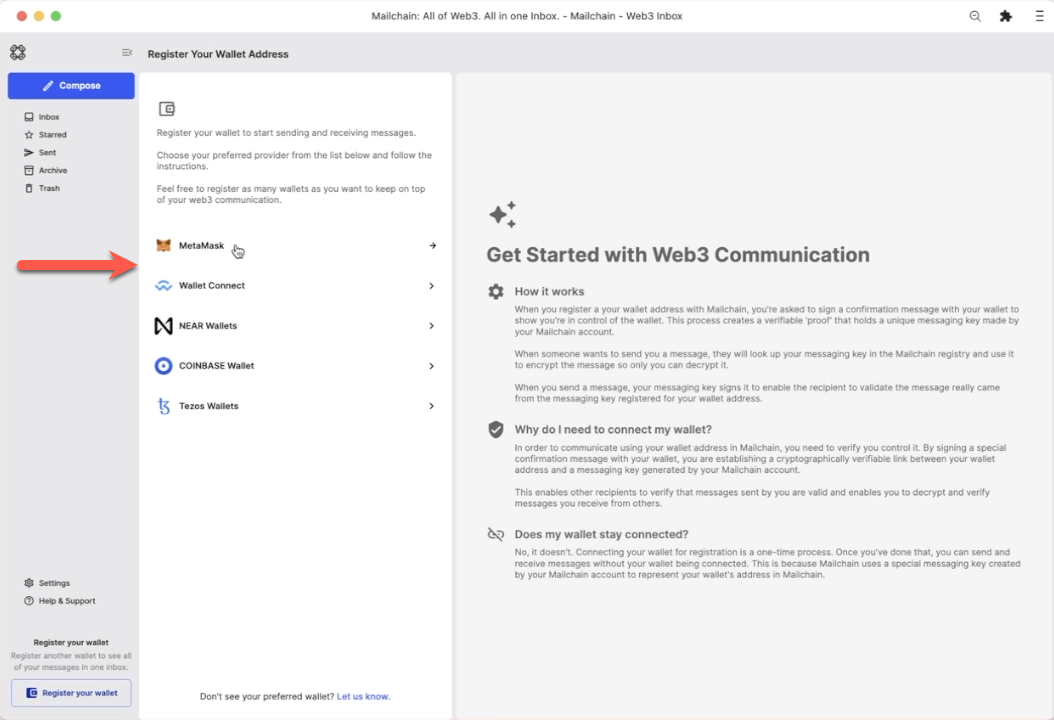
Select a wallet provider which supports the wallet address you are registering (e.g. Metamask for Ethereum and all other EVM addresses)
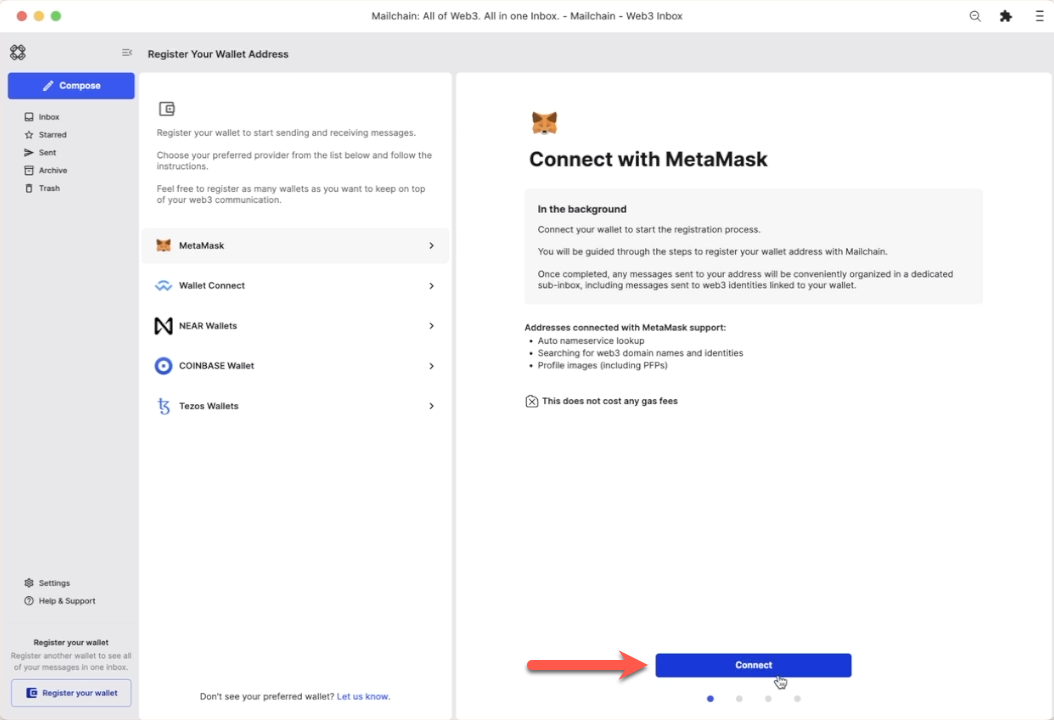
Click 'Connect'
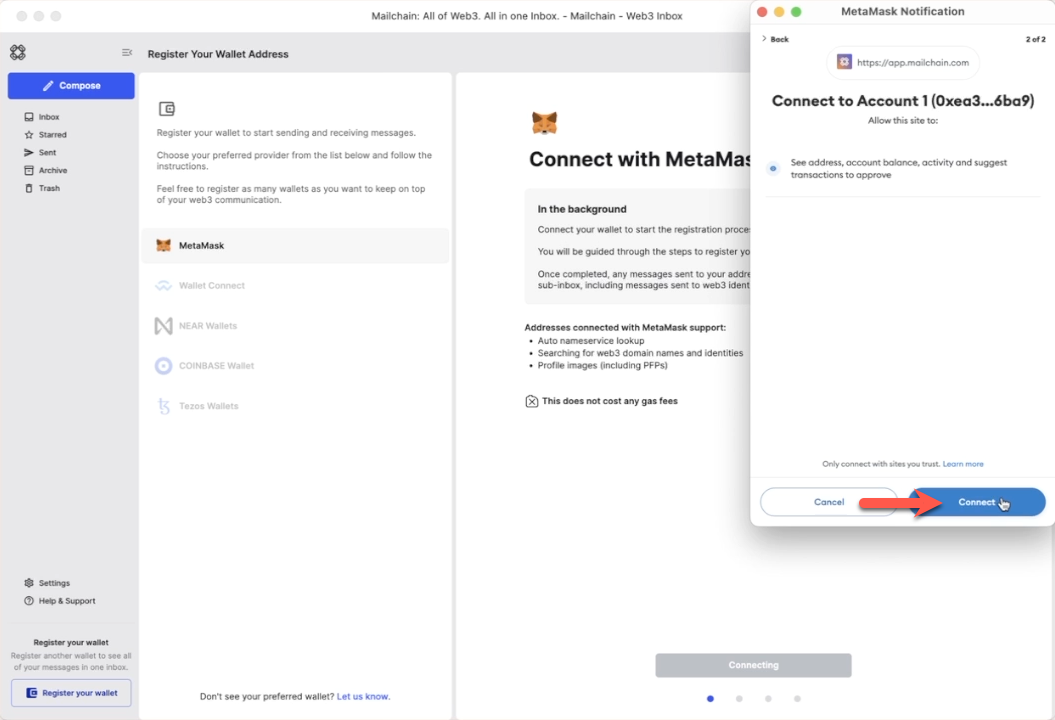
Select the address you would like to register, then click 'Next'

Click 'Connect' to confirm Mailchain should be able to read your address
Your wallet is now connected.
Follow these steps to connect and register an existing blockchain wallet address:
These steps may differ depending on the exact wallet or device you are using
Once you have signed into Mailchain, head to your Inbox (https://app.mailchain.com/inbox)
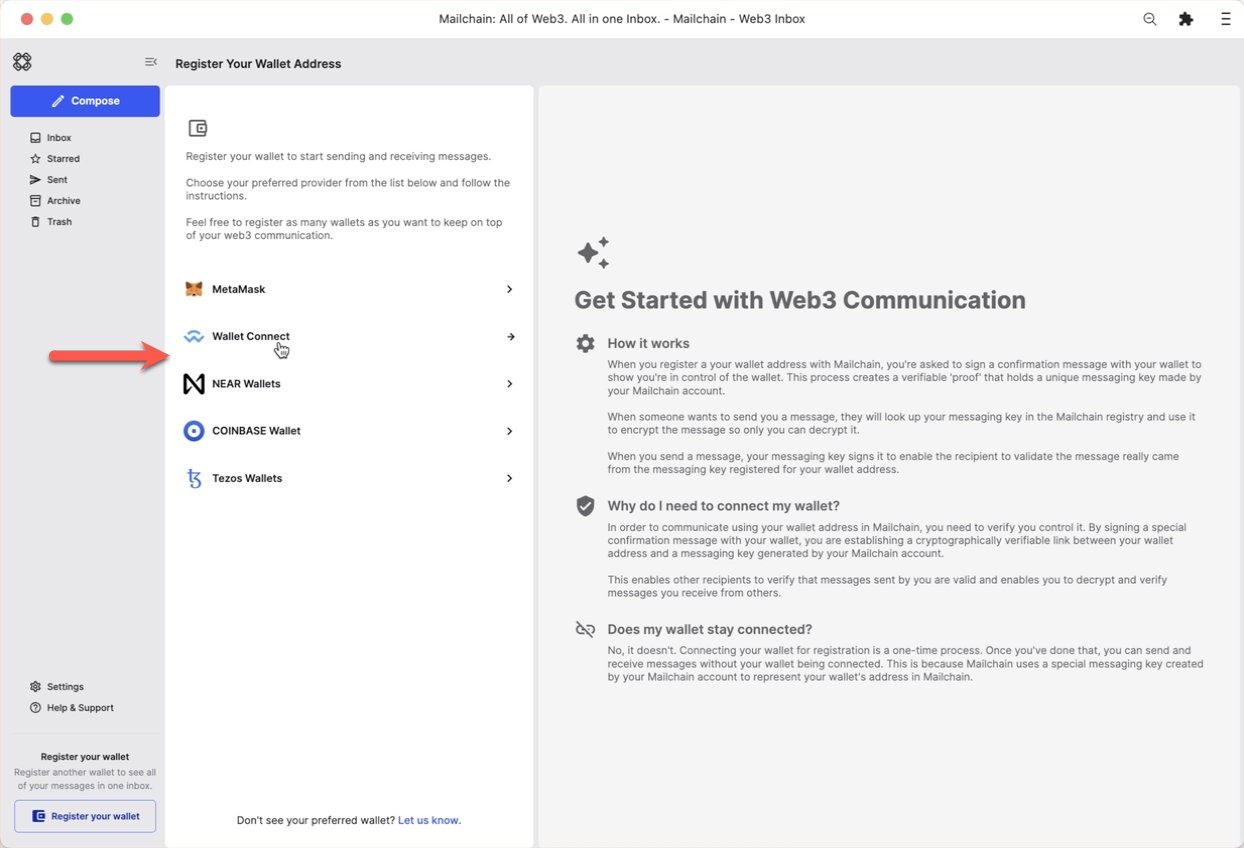
Click 'Register your wallet'
Select a wallet provider which supports the wallet address you are registering (e.g. WalletConnect for Ethereum and all other EVM addresses)
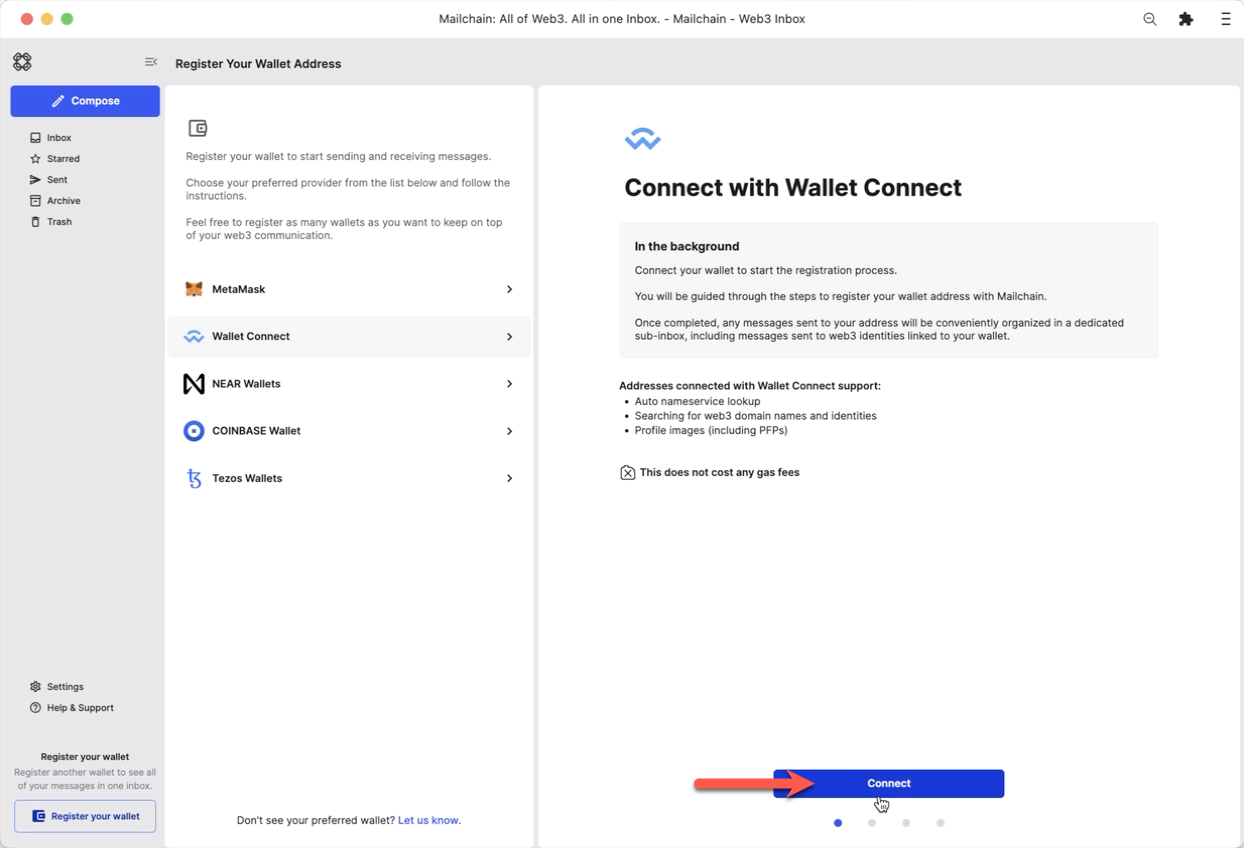
Click 'Connect'
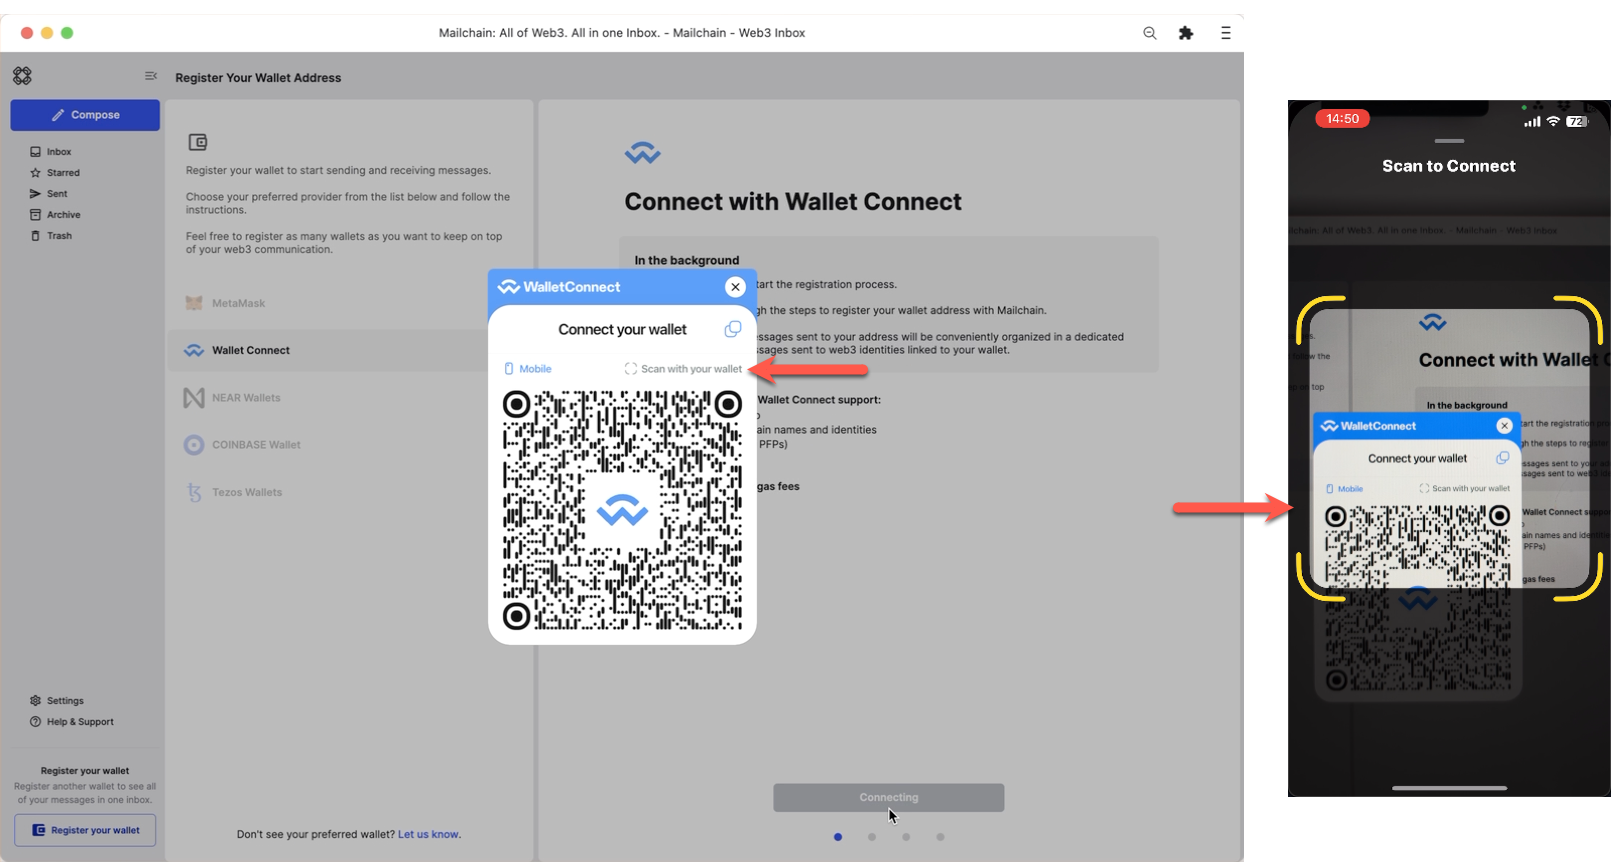
Using a WalletConnect compatible wallet, scan the QR code or copy and paste in the WalletConnect link
Select the address you would like to register, then click 'Connect' to confirm Mailchain should be able to read your address.
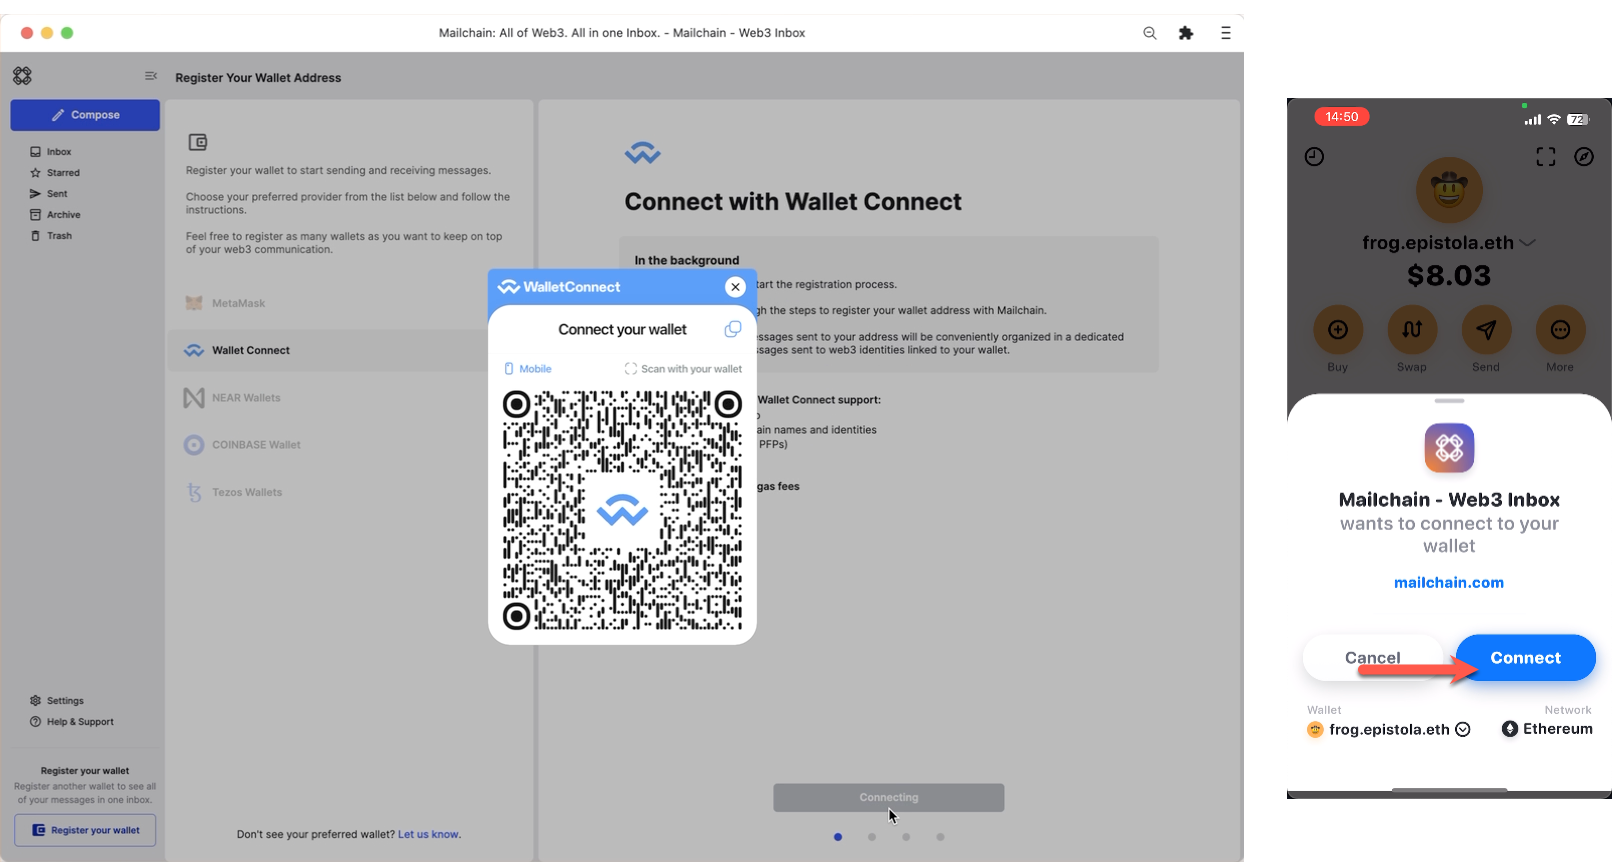
Your wallet is now connected.
Follow these steps to connect and register an existing blockchain wallet address:
Once you have signed into Mailchain, head to your Inbox (https://app.mailchain.com/inbox)
Click 'Register your wallet'
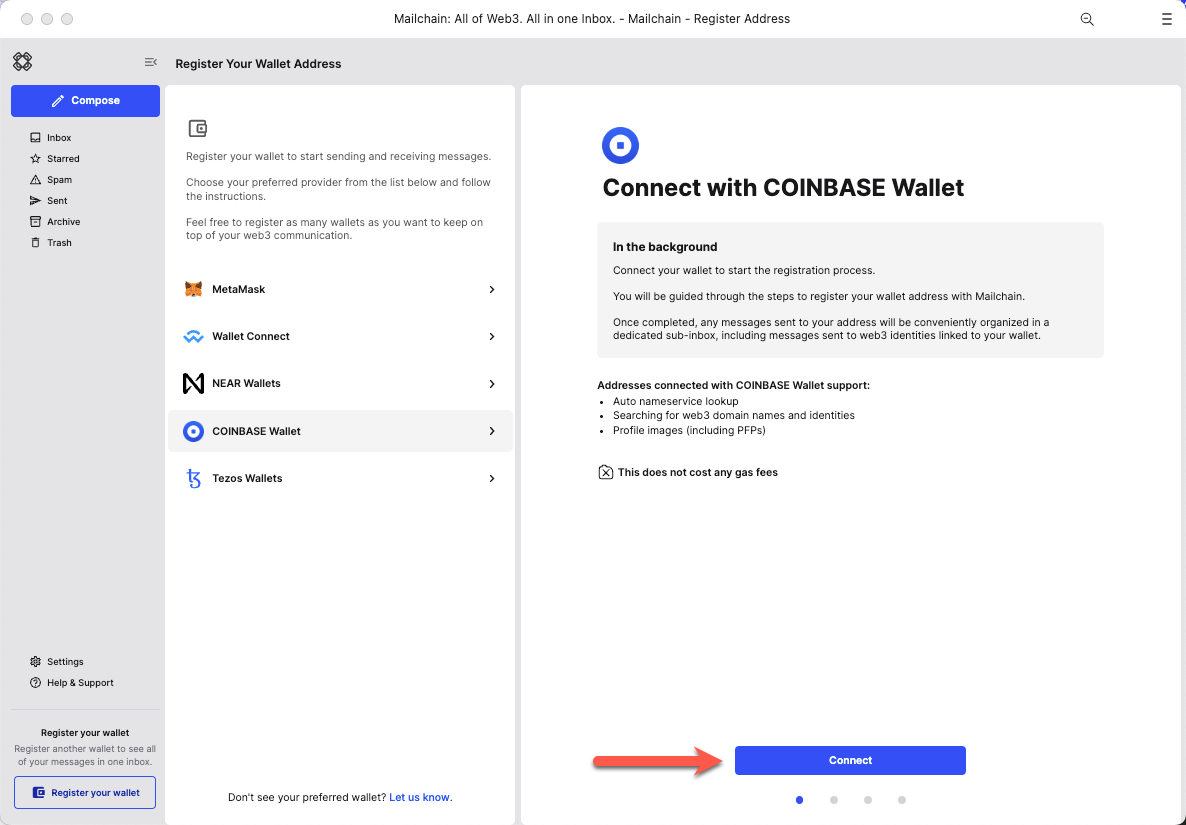
Select a wallet provider which supports the wallet address you are registering (e.g. Coinbase Wallet for Base, Ethereum and all other EVM addresses)
Click 'Connect'
Click 'Connect' to confirm Mailchain should be able to read your address
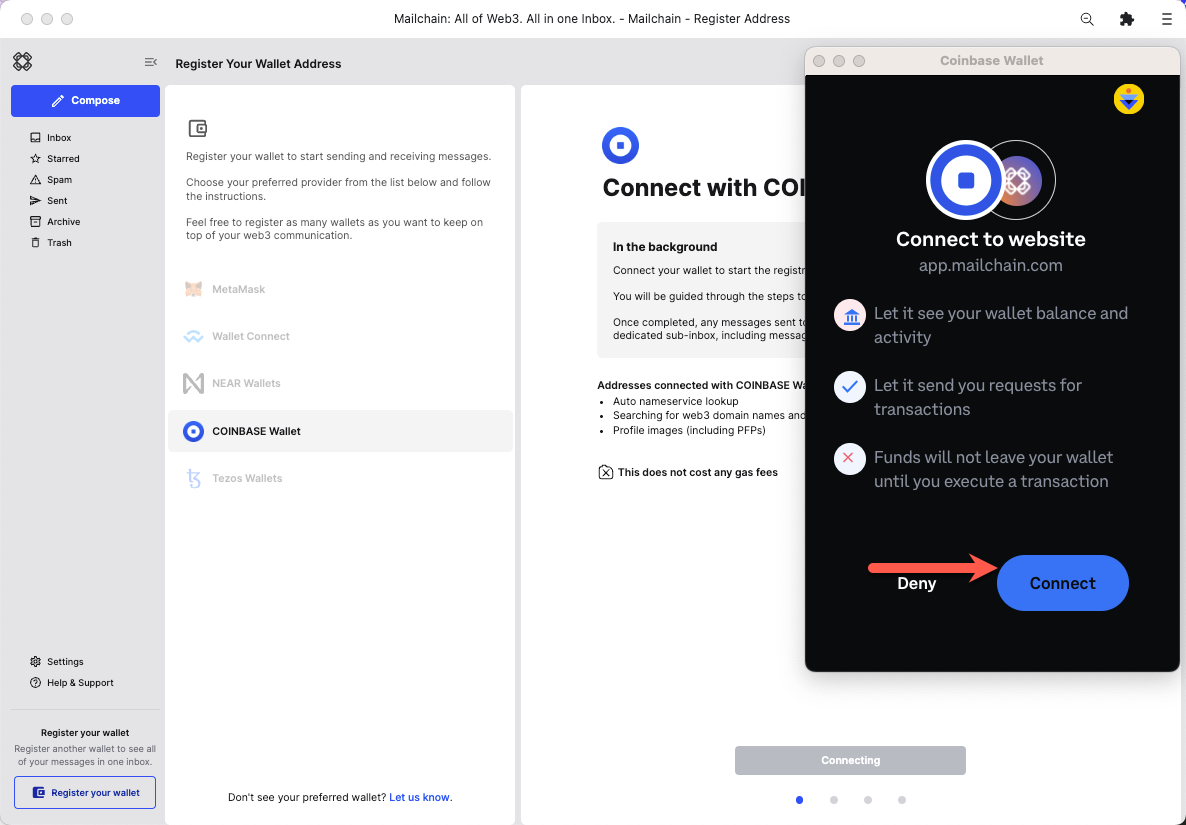
Your wallet is now connected.
Step 2: Verify your address
- Metamask
- WalletConnect
- Coinbase Wallet
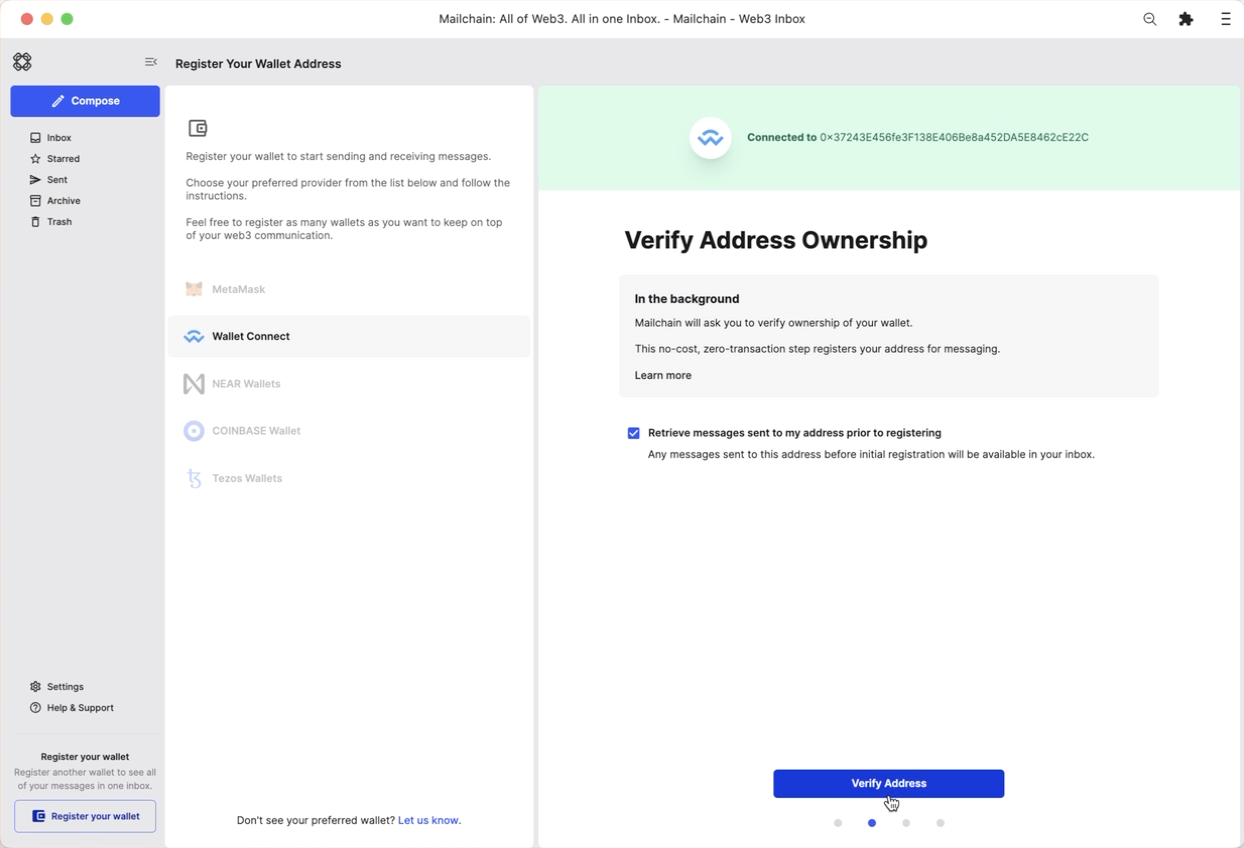
You can now register your wallet address with Mailchain. To do this click 'Verify Address'.
advanced optionBy default, Mailchain is able to receive messages for your existing blockchain wallet address before you sign up. If you do not wish to retrieve these messages, un-check the option to 'Retrieve messages sent to my address prior to registering'.

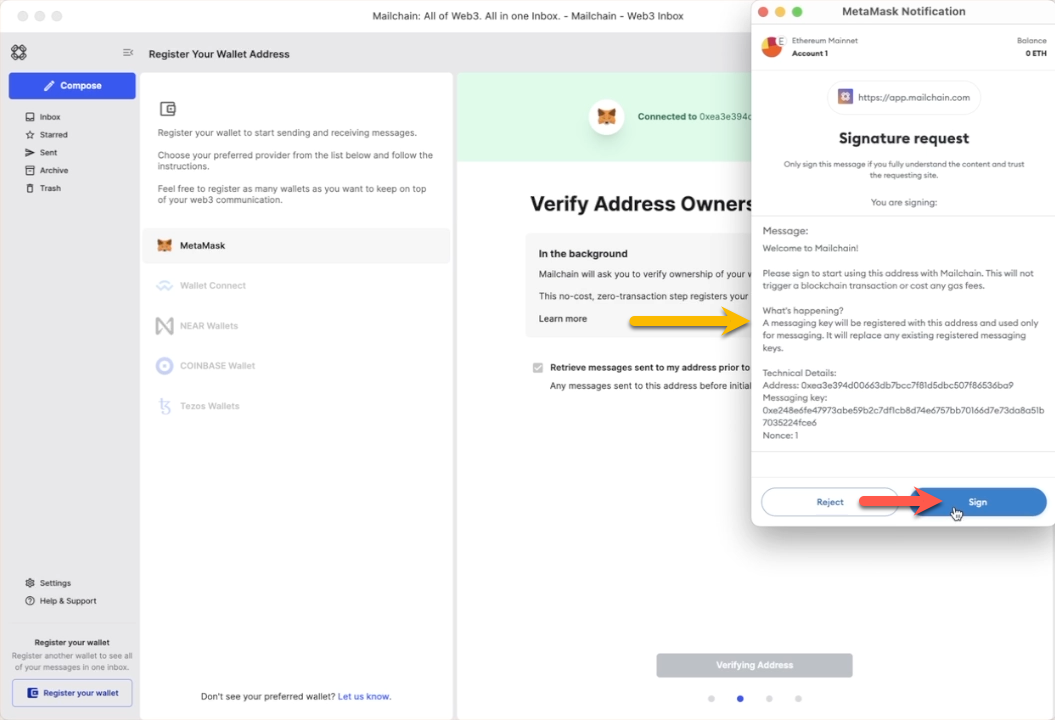
A 'Signature Request' will appear in your wallet. It contains the following text:
Message:
Welcome to Mailchain!Please sign to start using this address with Mailchain. This will not trigger a blockchain transaction or cost any gas fees.
What's happening?
A messaging key will be registered with this address and used only for messaging. It will replace any existing registered messaging keys.Technical Details:
Address:your_address
Messaging key:a_generated_messaging_key
Nonce:a_numberReview the request
Click 'Sign'
Your wallet is now verified.
These steps may differ depending on the exact wallet you are using
You can now register your wallet address with Mailchain. To do this click 'Verify Address'.
advanced optionBy default, Mailchain is able to receive messages for your existing blockchain wallet address before you sign up. If you do not wish to retrieve these messages, un-check the option to 'Retrieve messages sent to my address prior to registering'.
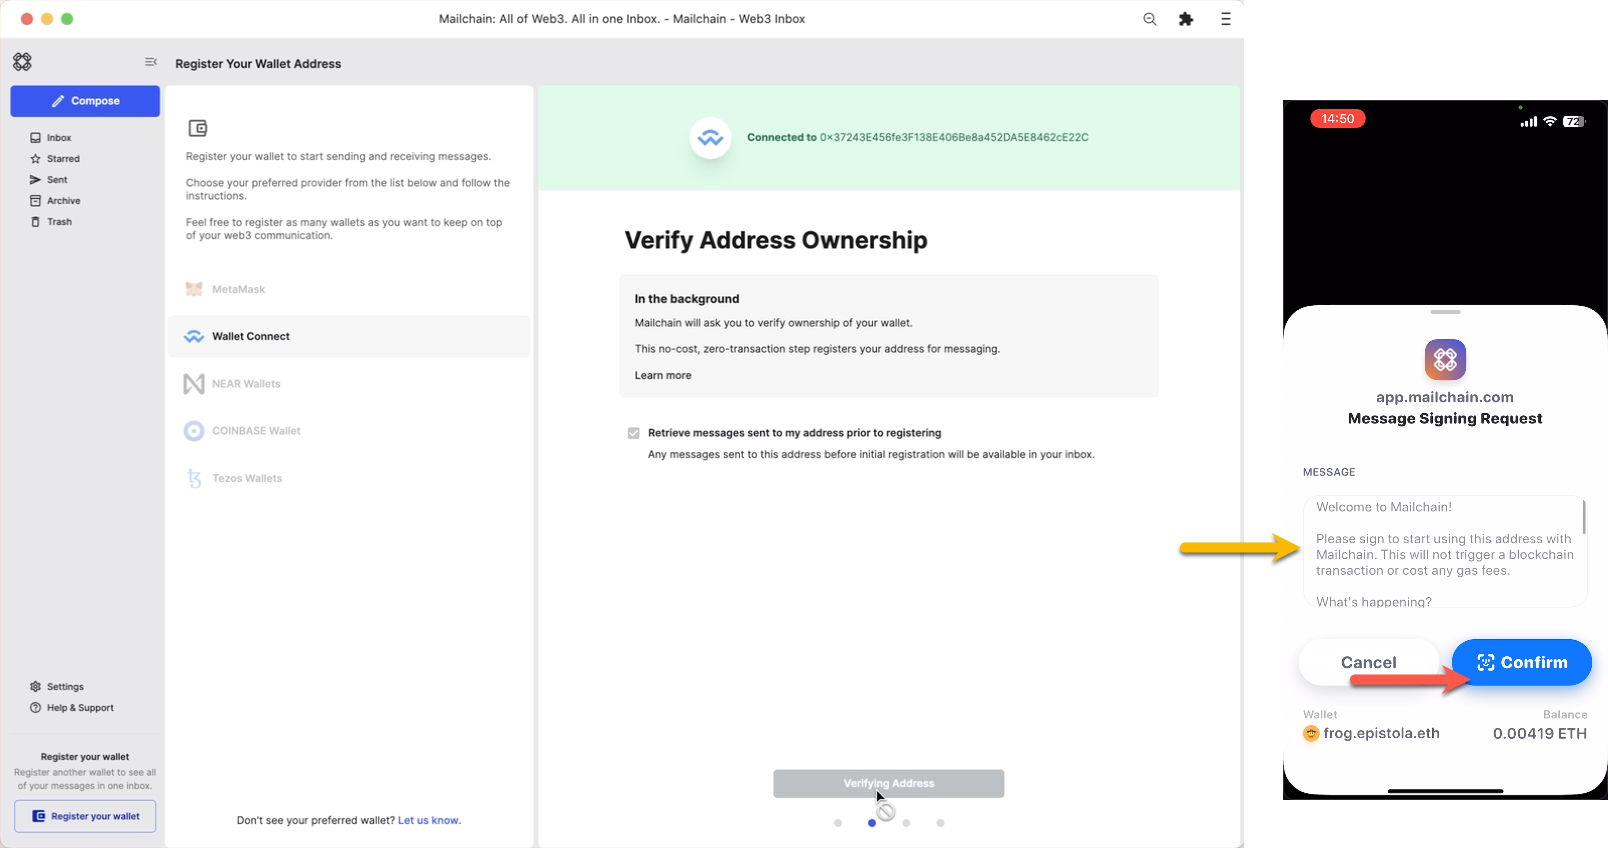
A 'Signature Request' will appear in your wallet. It contains the following text:
Message:
Welcome to Mailchain!Please sign to start using this address with Mailchain. This will not trigger a blockchain transaction or cost any gas fees.
What's happening?
A messaging key will be registered with this address and used only for messaging. It will replace any existing registered messaging keys.Technical Details:
Address:your_address
Messaging key:a_generated_messaging_key
Nonce:a_numberReview the request
Click 'Confirm' (or 'Sign' depending on your wallet)
Your wallet is now verified.
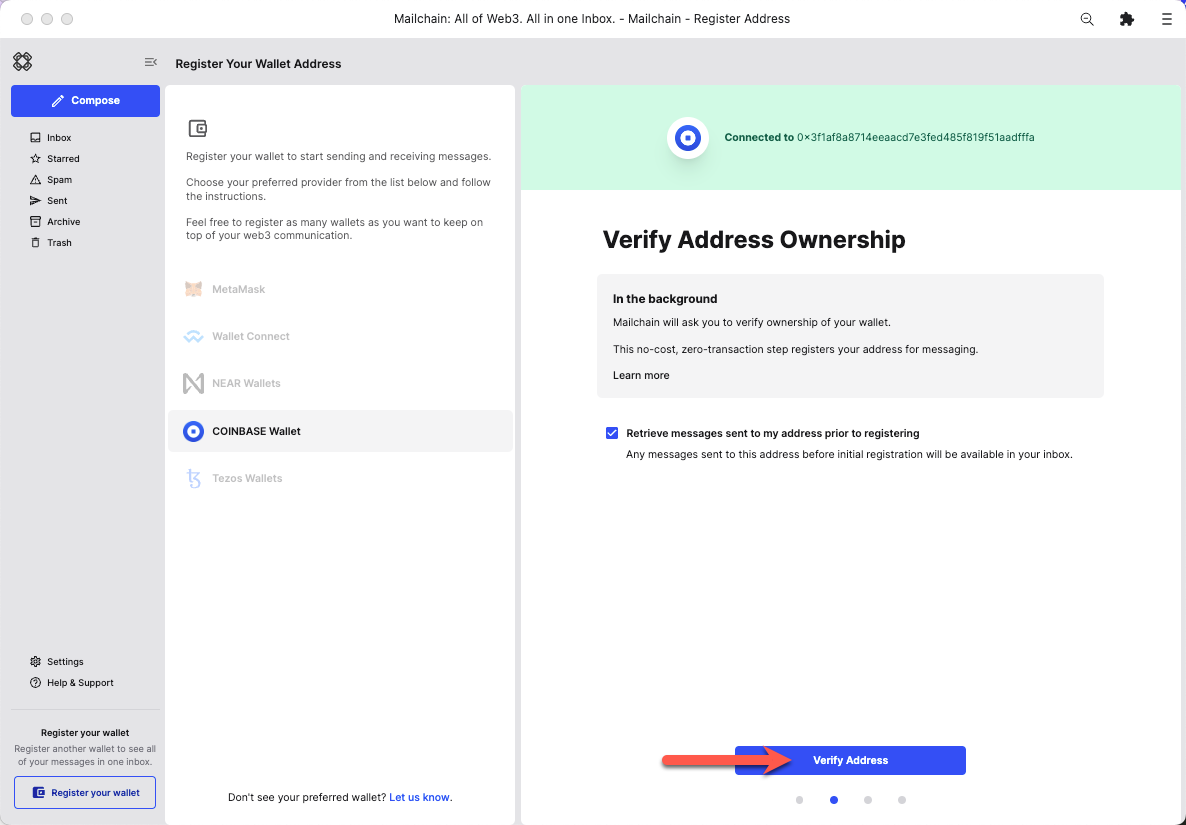
You can now register your wallet address with Mailchain. To do this click 'Verify Address'.
advanced optionBy default, Mailchain is able to receive messages for your existing blockchain wallet address before you sign up. If you do not wish to retrieve these messages, un-check the option to 'Retrieve messages sent to my address prior to registering'.
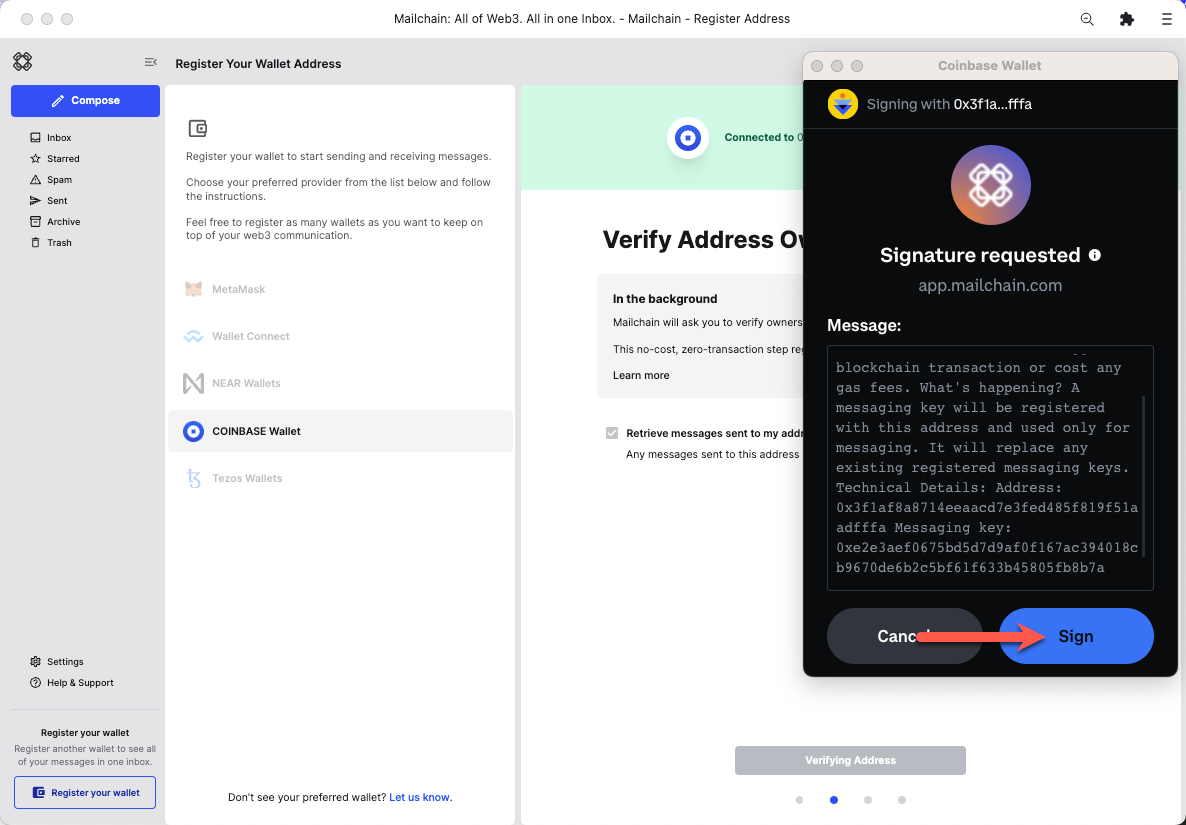
A 'Signature Request' will appear in your wallet. It contains the following text:
Message:
Welcome to Mailchain!Please sign to start using this address with Mailchain. This will not trigger a blockchain transaction or cost any gas fees.
What's happening?
A messaging key will be registered with this address and used only for messaging. It will replace any existing registered messaging keys.Technical Details:
Address:your_address
Messaging key:a_generated_messaging_key
Nonce:a_numberReview the request
Click 'Sign'
Your wallet is now verified.
Step 3: Web3 domain names and customization
- Metamask
- WalletConnect
- Coinbase Wallet
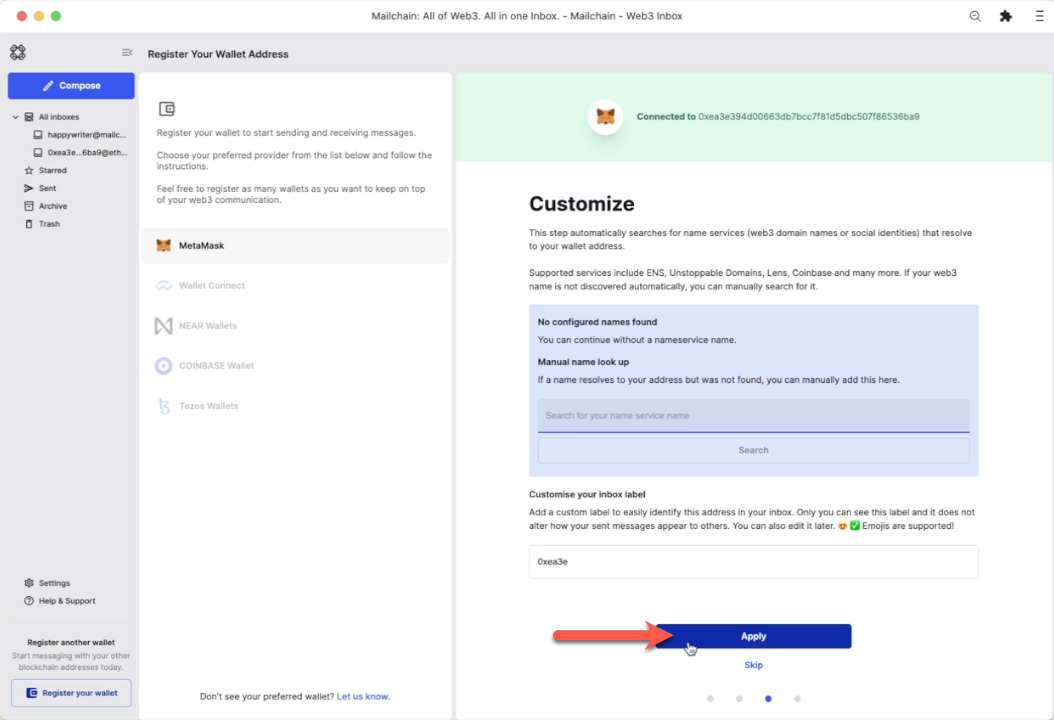
Mailchain will check if any supported Web3 domain names resolve to your address.
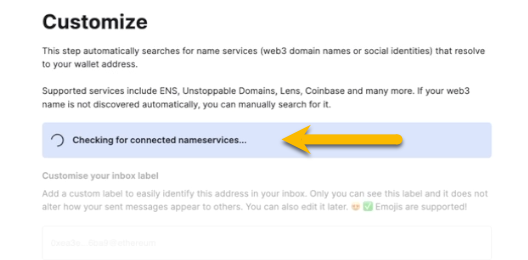
You can also manually search for a name if it does not appear. For more information on configuring domain name services, please see Web3 Domain Name Guides.
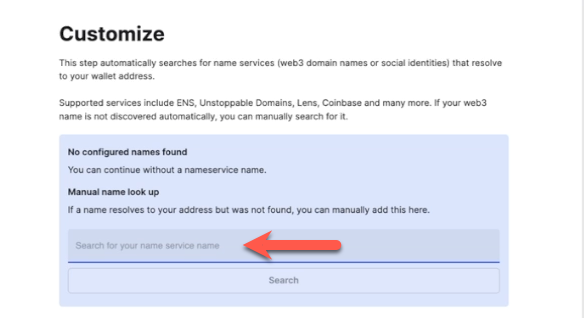
Click 'Apply' to save your changes.
Mailchain will check if any supported Web3 domain names resolve to your address.
You can also manually search for a name if it does not appear. For more information on configuring domain name services, please see Web3 Domain Name Guides.
Click 'Apply' to save your changes.
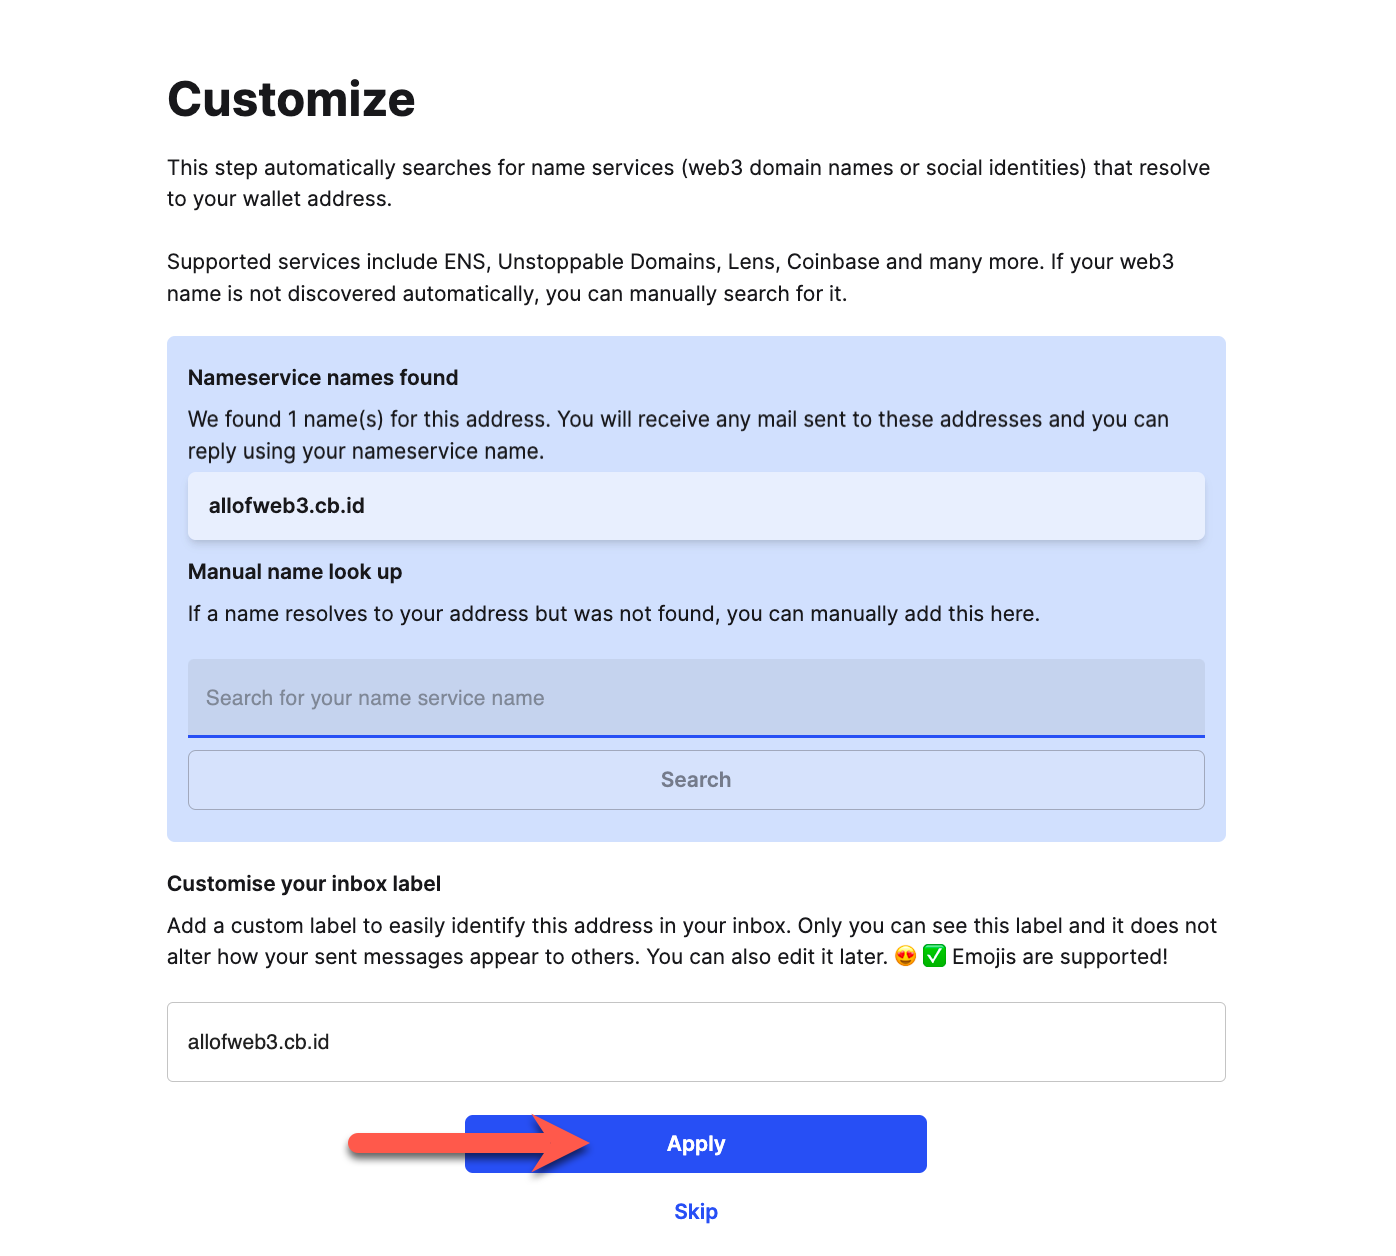
Mailchain will check if any supported Web3 domain names resolve to your address.
For Coinbase Decentralized IDs, you can also manually search for a name if it does not appear. For more information on configuring domain name services, please see Web3 Domain Name Guides.
Click 'Apply' to save your changes.
Step 4: Disconnect your wallet
- Metamask
- WalletConnect
- Coinbase Wallet
Click 'Disconnect' to disconnect your wallet from Mailchain.
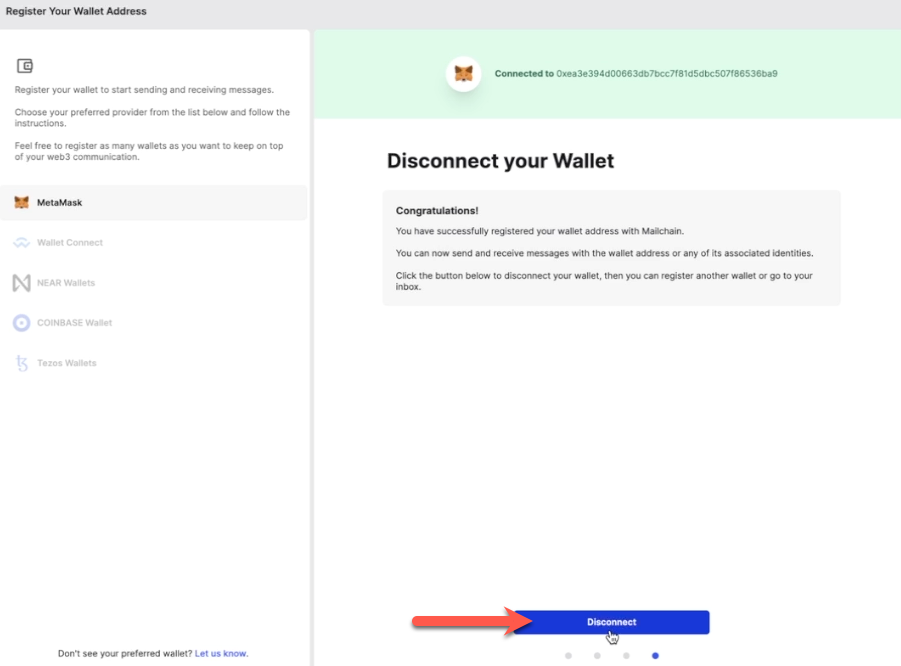
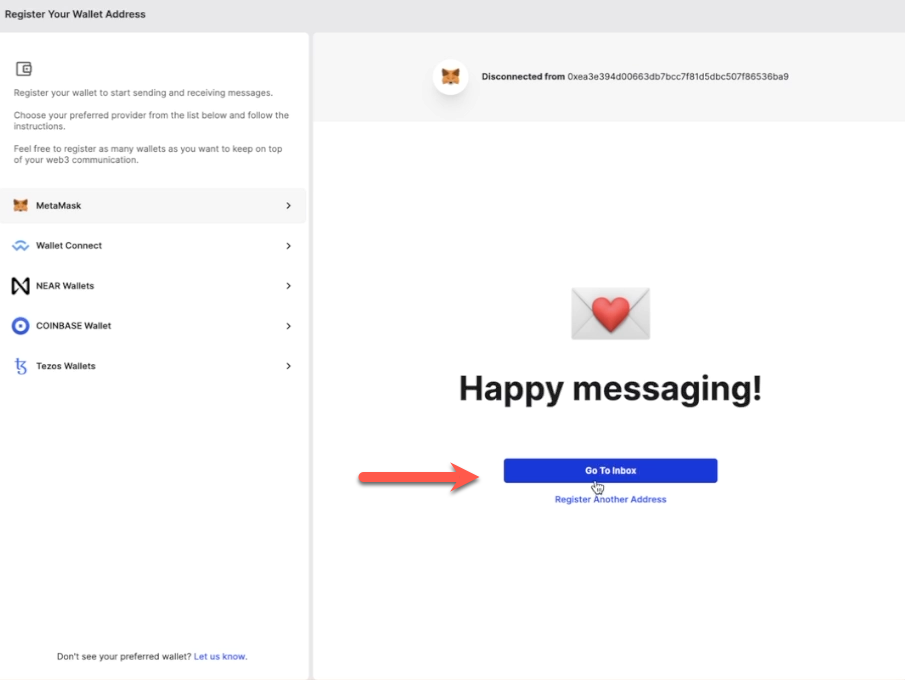
You have successfully registered your wallet address with a set of messaging keys that belong to your Mailchain account. You no longer need to have wallet connected to send and receive messages.
You now have the option to 'Go To Inbox' or to 'Register Another Address'.
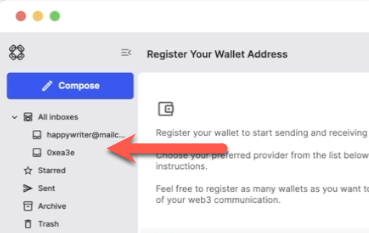
You will see your new sub-inbox in the left sidebar.
You have successfully registered your wallet address with a set of messaging keys that belong to your Mailchain account. You no longer need to have wallet connected to send and receive messages, so Mailchain disconnects it.
You now have the option to 'Go To Inbox' or to 'Register Another Address'.
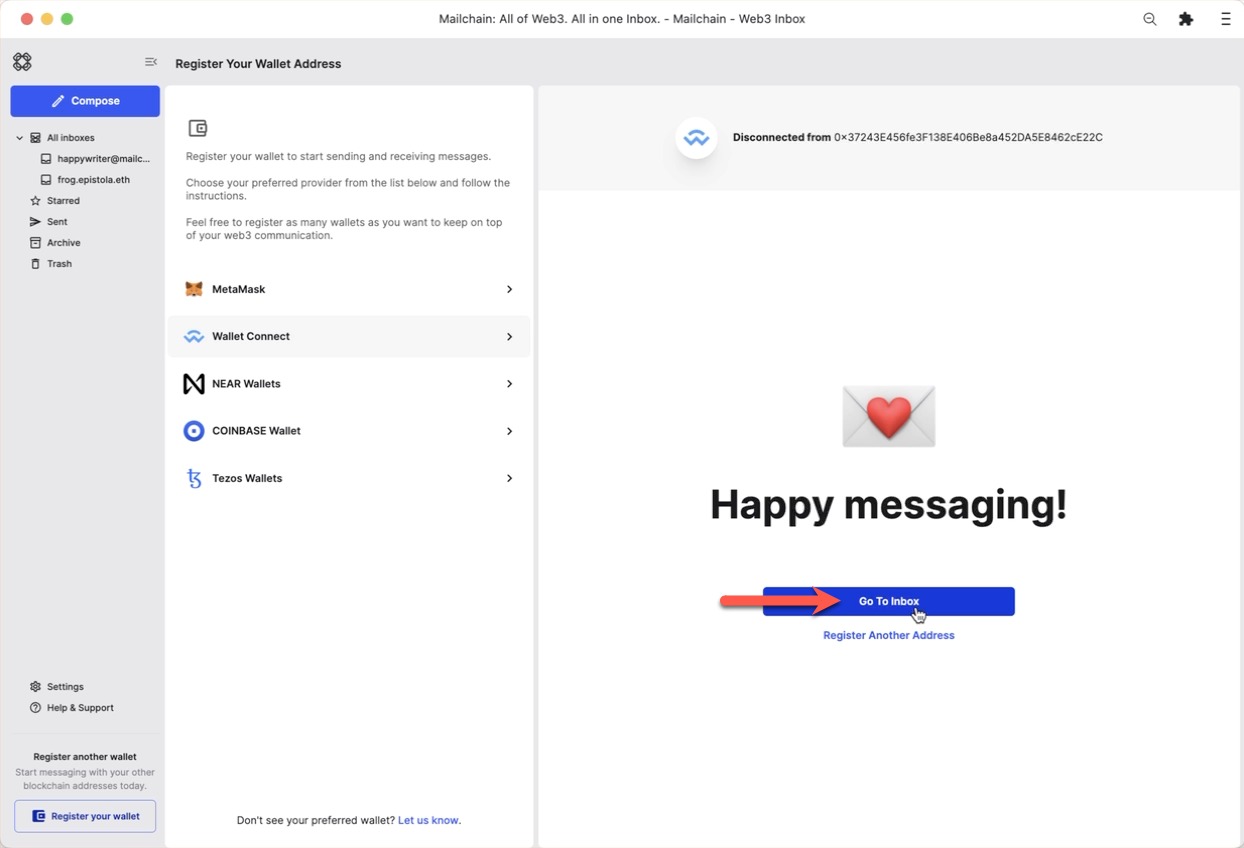
You will see your new sub-inbox in the left sidebar.
Click 'Disconnect' to disconnect your wallet from Mailchain.
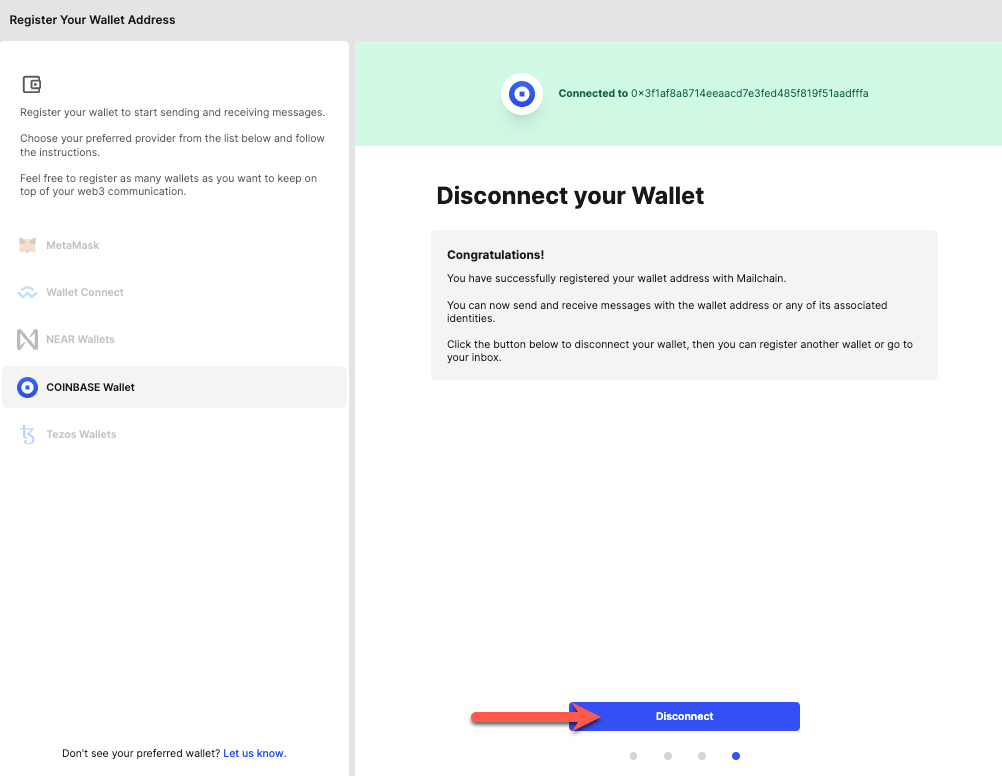
You have successfully registered your wallet address with a set of messaging keys that belong to your Mailchain account. You no longer need to have wallet connected to send and receive messages.
You now have the option to 'Go To Inbox' or to 'Register Another Address'.
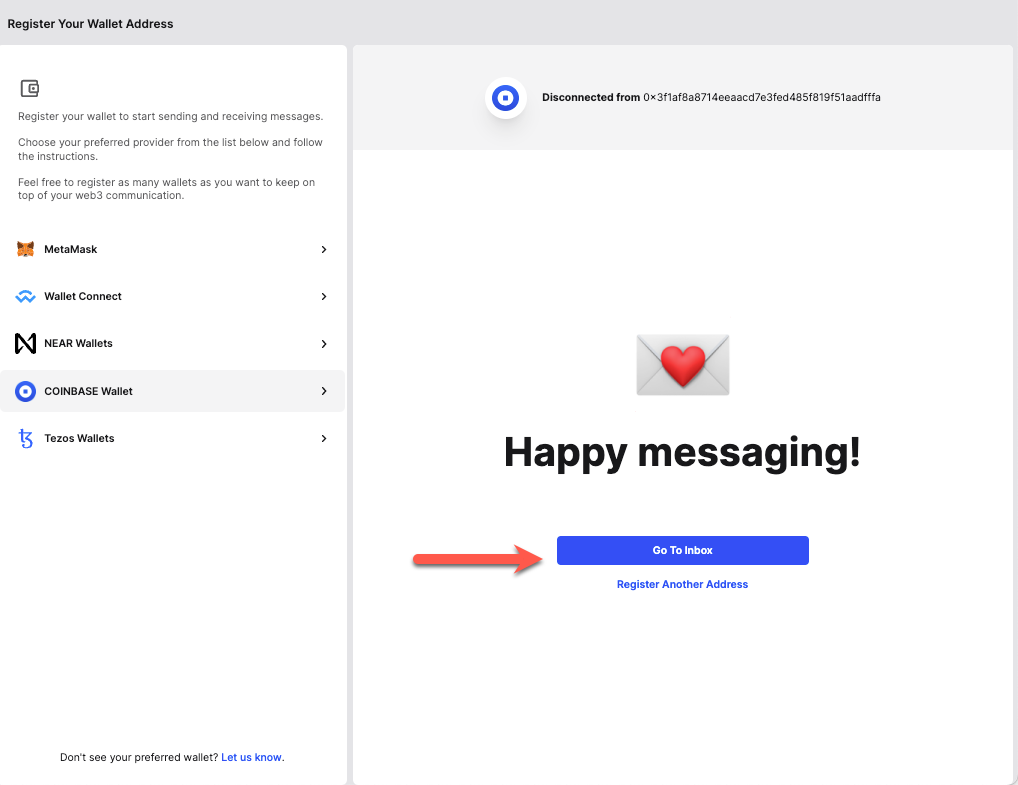
You will see your new sub-inbox in the left sidebar.