Passport Magic Links with Mailchain
This tutorial shows you how to create and send ‘login’ Magic links to any EVM-compatible blockchain address, ENS name or Unstoppable domain.
Solution Overview
In this tutorial, you will build a todo list app, complete with functionality that allows users to sign in with Mailchain. By following along with this tutorial, you will learn how to use Passport for passwordless authentication using Mailchain to send magic links.
As you work through the tutorial, you'll be using Express as our web framework, along with EJS as our template engine and CSS for styling. You will use SQLite as our database for storing data. Don't worry if you are not familiar with these technologies -- the necessary code will be provided at each step.
You can find an example of the final result here https://github.com/mailchain/todos-express-mailchain on Github.
Prerequisites
To complete this tutorial, you need:
- A working development environment with Node.js and Git
- An editor and terminal of your choosing.
- A Mailchain account for development and testing purposes.
Step 1 - Create a Starter App
You will start by creating a starter app, which has all the scaffolding needed to build a todo list.
Open a new terminal window on your computer, and run:
git clone https://github.com/passport/todos-express-starter.git mailchain-tutorial
You now have a directory named 'mailchain-tutorial'.
In your terminal, navigate into the directory by running:
cd mailchain-tutorial
You are in the folder with the starter app file.
Install the dependencies by running the following command in your terminal:
npm install
Start the server:
npm start
Check to see if it’s working by opening http://localhost:3000 in your browser.
You should be greeted with a todos ‘Sign in’ page similar to the following:
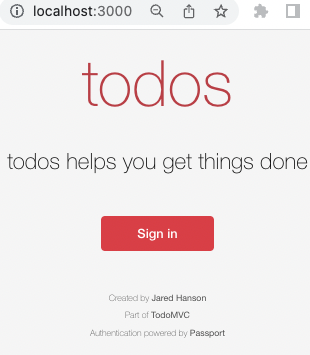
Congratulations! You're ready to add authentication to this very simple app.
Step 2 - Add a Login Page
To let users sign in with any valid wallet address, Web3 identity or Mailchain account. For that, you need to create a login page that prompts the user to enter one of these addresses.
In your terminal, create a file that will contain the authentication-related routes:
touch routes/auth.js
Open the mailchain-tutorial folder in your favorite code editor and navigate to the auth.js file you have just created in routes
In routes/auth.js add the following code, which creates a login route that will render the login page.
var express = require('express');

var router = express.Router();

router.get('/login', (req, res, next) => {
    res.render('login');
});

module.exports = router;
Now add the route to the app. To do this, open 'app.js' and add the newly created auth route by adding the highlighted code below:
var indexRouter = require('./routes/index');
var authRouter = require('./routes/auth'); // require your auth route

var app = express();
Now use the authRouter in the app. Below indexRouter, add the following highlighted line:
app.use('/', indexRouter);
app.use('/', authRouter); // app should 'use' your auth router
Now you will update the login page so the user can enter a Mailchain address. Open the existing login.ejs file in the views folder and add the following highlighted form under the heading:
<section class="prompt">
    <h3>todos</h3>
    <h1>Sign in</h1>
    <form action="/login/mailchain" method="post">
        <section>
            <label for="mailchain_address">Mailchain Address or ENS Name</label>
            <input
                id="mailchain_address"
                name="mailchain_address"
                type="text"
                autocomplete="username"
                placeholder="[email protected] or ensname.eth"
                required
                autofocus
            />
        </section>
        <button type="submit">Sign in with Mailchain</button>
    </form>
    <hr />
    <p class="help">Don't have an account? <a href="/signup">Sign up</a></p>
</section>
Restart your app in the terminal (ctrl + c if it's running the run npm start). Click sign in.
Excellent! You now have a login page that prompts the user to sign in with a Mailchain address or ENS name.
Step 3 - Setup Mailchain
Now you need a way to send Mailchain messages from the app.
For the purposes of this tutorial, you should create a Mailchain account for testing.
For a memorable naming scheme, you could append -test-dev to your existing account name when you create this test account, i.e. if you already use alice@mailchain, create a new account with alice-test-dev@mailchain
Go to Settings > Secret Recovery Phrase and retrieve the Secret Recovery Phrase for your Mailchain test account. Save it somewhere safe and private.
Now that you have the Secret Recovery Phrase and a Mailchain address, you should create a file to store it.
In your editor create a new file in mailchain-tutorial and label it .env. Open the .env file and add the following environment variables, setting your FROM_ADDRESS to your test account, with the associatedSECRET_RECOVERY_PHRASE:
# Mailchain Environment Variables
FROM_ADDRESS=**[email protected]**
SECRET_RECOVERY_PHRASE=**INSERT_SECRET_RECOVERY_PHRASE**
You also need to update your database schema to store an authenticating user's Mailchain address and verification status.
Open 'db.js'and insert the following highlighted lines to the CREATE user statement:
db.run(
    'CREATE TABLE IF NOT EXISTS users ( \
    id INTEGER PRIMARY KEY, \
    username TEXT UNIQUE, \
    hashed_password BLOB, \
    salt BLOB, \
    name TEXT, \
    mailchain_address TEXT UNIQUE, \
    mailchain_address_verified INTEGER, \
    email TEXT UNIQUE, \
    email_verified INTEGER \
)',
);
Now you need to delete the database and re-create it because you have already created the database in previous steps when testing the landing page.
NOTE: This will delete any data you may have added in this tutorial so far. If you are considering adding this solution to an existing app, you would simply run a DB migration to alter your users table.
To delete the database, open a new terminal in your editor and run:
rm ./var/db/todos.db
Nice work! You're now ready to configure the Passport JS login strategy.
Step 4 - Configure the Strategy
Now that you've set up Mailchain, you are ready to configure Passport and the passport-magic-linkstrategy.
In the terminal, install the necessary dependencies:
npm install passport
npm install passport-magic-link
npm install @mailchain/sdk
Open auth.js in the routes folder and require the newly installed packages or files as highlighted below:
var express = require('express');
var passport = require('passport');
var MagicLinkStrategy = require('passport-magic-link').Strategy;
var { Mailchain } = require('@mailchain/sdk');
var db = require('../db');
var router = express.Router();
Next, in the same file, add the following highlighted code block:
var router = express.Router();
var mailchain = Mailchain.fromSecretRecoveryPhrase(process.env.SECRET_RECOVERY_PHRASE);
var fromAddress = process.env['FROM_ADDRESS'] || mailchain.user().address;
const createMailchainAddress = function (address) {
    switch (address) {
        case address.match(/^[\d\w\-\_]*@mailchain\.com$/)?.input: // Mailchain address:
            return address;
        case address.match(/^0x[a-fA-F0-9]{40}$/)?.input: // Ethereum address:
            return address + '@ethereum.mailchain.com';
        case address.match(/^.*\.eth$/)?.input: // ENS address:
            return address + '@ens.mailchain.com';
        case address.match(/^.*\.*@mailchain$/)?.input: // Mailchain address without .com:
            return address + '.com';
        default:
            console.error('Invalid address');
    }
};
passport.use(
    new MagicLinkStrategy(
        {
            secret: 'keyboard cat', // change this to something secret
            userFields: ['mailchain_address'],
            tokenField: 'token',
            verifyUserAfterToken: true,
        },
        async (user, token) => {
            var link = 'http://localhost:3000/login/mailchain/verify?token=' + token;

            var msg = {
                to: [createMailchainAddress(user.mailchain_address)],
                from: fromAddress,
                subject: 'Sign in to Todos',
                content: {
                    text: 'Hello! Click the link below to finish signing in to Todos.\r\n\r\n' + link,
                    html:
                        '<h3>Hello!</h3><p>Click the link below to finish signing in to Todos.</p><p><a href="' +
                        link +
                        '">Sign in</a></p>',
                },
            };
            const { data, error } = await mailchain.sendMail(msg);
            if (error) {
                throw new Error('Mailchain error', { cause: error });
            }
            console.log('sent mail', data);
            return data;
        },
        (user) => {
            return new Promise((resolve, reject) => {
                db.get('SELECT * FROM users WHERE mailchain_address = ?', [user.mailchain_address], (err, row) => {
                    if (err) {
                        return reject(err);
                    }
                    if (!row) {
                        db.run(
                            'INSERT INTO users (mailchain_address, mailchain_address_verified) VALUES (?, ?)',
                            [user.mailchain_address, 1],
                            function (err) {
                                if (err) {
                                    return reject(err);
                                }
                                var id = this.lastID;
                                var obj = {
                                    id,
                                    mailchain_address: user.mailchain_address,
                                };
                                return resolve(obj);
                            },
                        );
                    } else {
                        return resolve(row);
                    }
                });
            });
        },
    ),
);

router.get('/login', (req, res, next) => {
    res.render('login');
});
The MagicLinkStrategy is now configured. The strategy will sanitize the input address, then send mails containing a magic link using Mailchain. When the user clicks on the magic link, the user record associated with the Mailchain address will be found. If a user record does not exist, one is created the first time someone signs in.
Step 5 - Send Magic Link
Now that you have prompted the user for their Mailchain address, and have the strategy configured, the next step is to send the user a Mailchain message containing the Magic Link when they click "Sign in with Mailchain.”
You should still be working in the auth.js file in routes but if not, open it now.
Add the following route below login route:
router.get('/login', (req, res, next) => {
    res.render('login');
});

router.post(
    '/login/mailchain',
    passport.authenticate('magiclink', {
        action: 'requestToken',
        failureRedirect: '/login',
    }),
    (req, res, next) => {
        res.redirect('/login/mailchain/check');
    },
);

module.exports = router;
This route will process the form data from the login page and call the '/login/mailchain/check' route to send a Mailchain message to that user.
Continuing within auth.js, add the route for '/login/mailchain/check' before module.exports = router;:
router.get('/login/mailchain/check', (req, res, next) => {
    res.render('login/mailchain/check');
});

module.exports = router;
This route will render a page instructing the user to check their Mailchain account and to click the link to authenticate login.
Step 6 - Verify Mailchain Address
Now that the application can send the user a Mailchain message with a magic link, the next step is to verify the Mailchain address when they click the link.
Within auth.js in your routes section, add this route in the highlighted section below the /login/mailchain/check route:
router.get('/login/mailchain/check', (req, res, next) => {
    res.render('login/mailchain/check');
});

router.get(
    '/login/mailchain/verify',
    passport.authenticate('magiclink', {
        successReturnToOrRedirect: '/',
        failureRedirect: '/login',
    }),
);
This route will verify the Mailchain address when the link is clicked.
Now in the terminal, create a folder and corresponding view for our route, by running the following commands in the terminal:
mkdir views/login/mailchain
touch views/login/mailchain/check.ejs
In your code editor, navigate to the file you have just created, (views/login/mailchain/check.ejsand add the following code:
<!DOCTYPE html>
<html lang="en">
<head>
<meta charset="utf-8" />
<meta name="viewport" content="width=device-width, initial-scale=1" />
<title>Express • TodoMVC</title>
<link rel="stylesheet" href="/css/base.css" />
<link rel="stylesheet" href="/css/index.css" />
<link rel="stylesheet" href="/css/login.css" />
</head>
<body>
<section class="prompt">
<h3>todos</h3>
<h1>Check your Mailchain Inbox</h1>
<p class="instructions">
We sent a magic link to your Mailchain address. Click the link in that message to sign in.
</p>
<hr />
<p class="help">Didn't receive the message? <a href="/login">Get another link</a></p>
</section>
<footer class="info">
<p>Created by <a href="https://www.jaredhanson.me">Jared Hanson</a></p>
<p>Part of <a href="https://todomvc.com">TodoMVC</a></p>
<p>
Authentication powered by
<a href="https://www.passportjs.org">Passport</a>
<br />
& <a href="https://mailchain.com">Mailchain</a>
</p>
</footer>
</body>
</html>
Now, update views/index.ejs to include the user.mailchain_address field. Change the highlighted the line to match the snippet below:
<nav class="nav">
    <ul>
        <li class="user"><%= user.name || user.username || user.email || user.mailchain_address %></li>
        <li>
            <form action="/logout" method="post">
                <button class="logout" type="submit">Sign out</button>
            </form>
        </li>
    </ul>
</nav>
You have now configured the flow for users to click "Sign in", then enter a Mailchain address or ENS name. When the user clicks "Sign in with Mailchain", the app will send a magic link.
Next you need to be able to establish a login session for an authenticated user.
Step 7 - Establish Session
Once you've verified the user's Mailchain address, you need to establish a login session for the user as they navigate the app. To do that, you can add session support.
Start by running the following code in the terminal to instal the necessary dependencies:
npm install express-session
npm install connect-sqlite3
Open app.js and require the additional dependencies highlighted in the snippet below:
var logger = require('morgan');
var passport = require('passport');
var session = require('express-session');
var SQLiteStore = require('connect-sqlite3')(session);
In the same file, add the following highlighted section of code:
app.use(express.static(path.join(__dirname, 'public')));

app.use(
    session({
        secret: 'keyboard cat',
        resave: false,
        saveUninitialized: false,
        store: new SQLiteStore({ db: 'sessions.db', dir: './var/db' }),
    }),
);
app.use(passport.authenticate('session'));

app.use('/', indexRouter);
app.use('/', authRouter);
Now you can configure Passport to manage the login session. Open auth.js before the routes section, add the following highlighted code snippet:
passport.serializeUser((user, cb) => {
    process.nextTick(() => {
        cb(null, { id: user.id, mailchain_address: user.mailchain_address });
    });
});

passport.deserializeUser((user, cb) => {
    process.nextTick(() => {
        return cb(null, user);
    });
});

router.get('/login', (req, res, next) => {
    res.render('login');
});
Now try signing in again. In the terminal, run:
npm start
Open http://localhost:3000, click "Sign in", enter your Mailchain address or your ENS name and click "Sign in with Mailchain".
Now, check your Mailchain Inbox and click the link.
You are now logged in and should see a screen similar to below! Go ahead and enter some tasks you've been needing to get done.
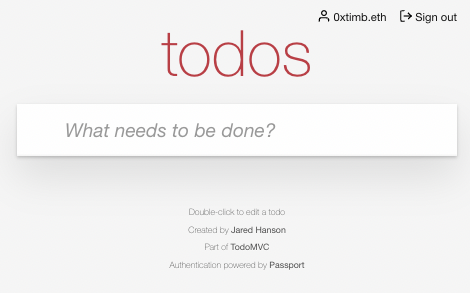
Now users can sign in with Mailchain! Next, in the last step of this tutorial, you will add the ability to sign out.
Step 8 - Sign Out
Now that users can sign in, they'll need a way to sign out.
Open 'routes/auth.js' and a new route for logout below the '/login/mailchain/verify' route:
router.get(
    '/login/mailchain/verify',
    passport.authenticate('magiclink', {
        successReturnToOrRedirect: '/',
        failureRedirect: '/login',
    }),
);

router.post('/logout', (req, res, next) => {
    req.logout((err) => {
        if (err) {
            return next(err);
        }
        res.redirect('/');
    });
});
Restart your app in the terminal (ctrl + c), then go back to your browser window. You should already be signed in, and can now click "Sign out."
Congratulations! You've now got a working app where users can sign in and sign out using Mailchain!